No Bake Oreo Cheesecake Simple and Delicious Treat

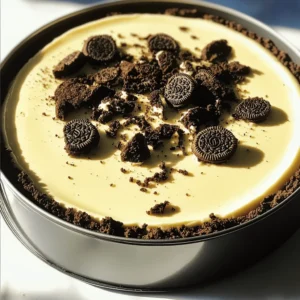
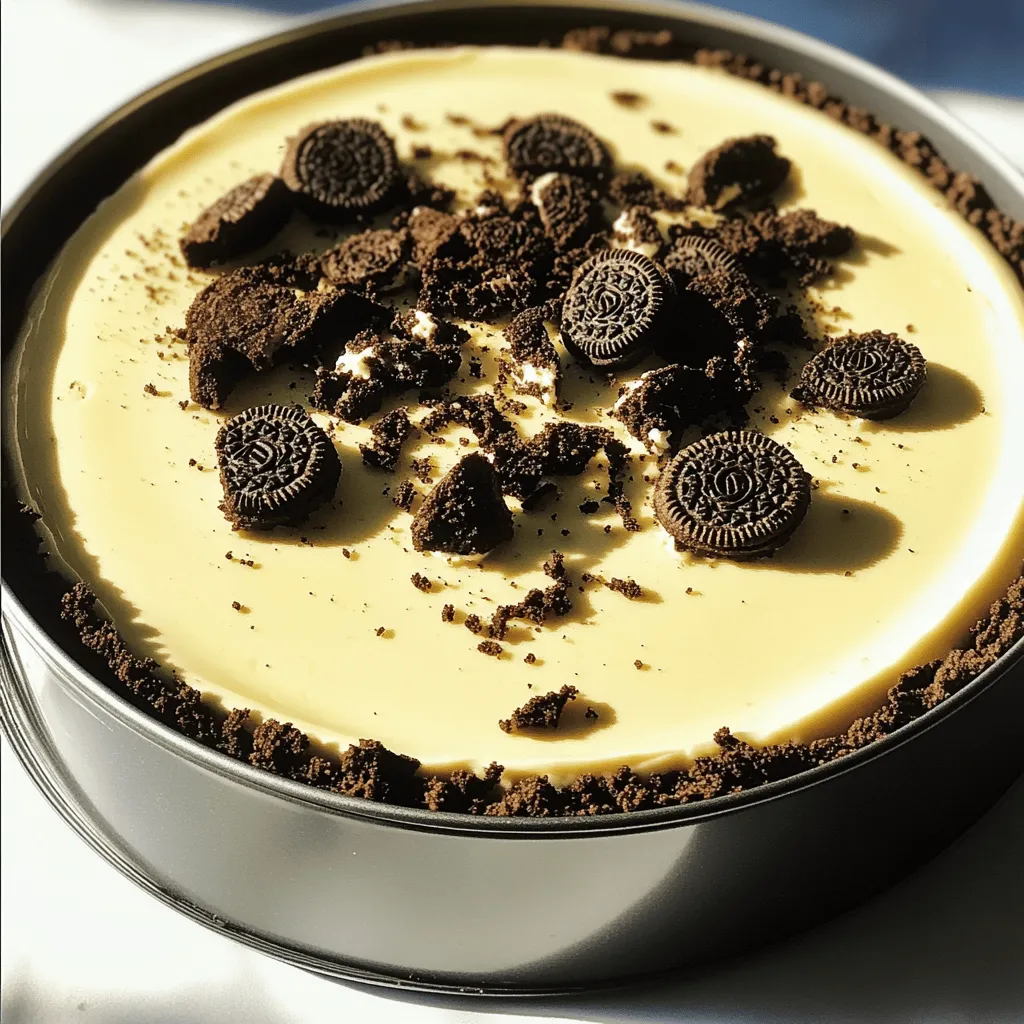
Are you ready to indulge in a dessert that’s both simple and delicious? This No Bake Oreo Cheesecake is your ticket to creamy bliss without turning on the oven. I’ll guide you through each easy step, from crafting the perfect crust to making a light and fluffy filling. This treat is perfect for any gathering or a cozy night in. Let’s get started on your new favorite dessert!

To make a No Bake Oreo Cheesecake, you will need the following ingredients: - 24 Oreo cookies, crushed - 4 tablespoons unsalted butter, melted - 16 oz cream cheese, softened - 1 cup powdered sugar - 1 teaspoon vanilla extract - 1 cup heavy whipping cream - 12 Oreo cookies, roughly chopped for filling - 6 Oreo cookies, crushed for topping - Optional: Chocolate shavings for garnish These ingredients combine to create a rich and creamy dessert. The Oreos give a great flavor and crunch. Using unsalted butter helps control the saltiness. Cream cheese adds a smooth texture, while powdered sugar sweetens the mix. Vanilla extract enhances the cheesecake's flavor. Heavy whipping cream makes it light and fluffy. Chopped Oreos throughout the filling add more cookie goodness. Crushed Oreos on top provide a nice finish. If you want to get fancy, add chocolate shavings for garnish. To make the crust, start by crushing 24 Oreo cookies. You can use a food processor or place them in a bag and crush them with a rolling pin. Next, melt 4 tablespoons of unsalted butter. Mix the crushed cookies with the melted butter until it looks like wet sand. This mixture is key to a tasty crust. Now, take a 9-inch springform pan. Press the Oreo mixture into the bottom of the pan. Use the back of a measuring cup to pack it tightly. This helps the crust hold together. Once you finish, put the pan in the fridge while you make the filling. Chilling it will keep the crust firm. In a large bowl, beat 16 ounces of softened cream cheese. Use an electric mixer set to medium speed. Mix until it is smooth and creamy. This step is important for a rich filling. Then, slowly add in 1 cup of powdered sugar and 1 teaspoon of vanilla extract. Continue mixing until everything is well combined. In a separate bowl, whip 1 cup of heavy cream on high speed. Whip until stiff peaks form. This means when you lift the beaters, the cream holds its shape. Gently fold the whipped cream into the cream cheese mixture. Be careful not to deflate the whipped cream. This keeps the filling light and fluffy. Finally, stir in 12 roughly chopped Oreo cookies. They add a nice texture to the filling. Take the crust out of the fridge. Pour the filling over the chilled crust. Spread it evenly across the surface. Tap the springform pan on the counter a few times. This helps remove any air bubbles. For a final touch, sprinkle 6 crushed Oreo cookies on top of the cheesecake. This adds a delicious decoration. Cover the cheesecake with plastic wrap. Refrigerate it for at least 4 hours, or overnight if you can wait. This allows the cheesecake to set properly. After it's firm, carefully remove the sides of the springform pan. If you want, add chocolate shavings as a garnish. Enjoy your no-bake Oreo cheesecake! To get the best texture for your No Bake Oreo Cheesecake, use cream cheese at room temperature. Cold cream cheese can make lumps in your filling. Softened cream cheese mixes in smoothly. This gives your cheesecake a creamy base. Folding is key to making your filling light and airy. After you whip the cream, gently fold it into the cream cheese mix. Use a spatula and move in a circular motion. Be careful not to stir too hard. You want to keep the air in the whipped cream. For toppings, sprinkle crushed Oreo cookies on top. You can also add chocolate shavings for extra flair. These toppings not only look good but also add more flavor. Pair your cheesecake with a glass of cold milk or a cup of coffee. The rich flavors of the cheesecake work well with these drinks. If you want something sweet, serve it with chocolate ice cream. This makes a great dessert combo that everyone will love. {{image_2}} You can easily change the flavor of your No Bake Oreo Cheesecake. One fun way is to use different cookies. For example, try using Golden Oreos instead of regular ones. This will give your cheesecake a sweeter and lighter taste. You can also add mint extract to the filling. Just a teaspoon will make your dessert fresh and cool. If you want a richer flavor, consider adding a bit of espresso powder. This enhances the chocolate taste of the Oreos. You can adjust the recipe to fit any gathering size. If you have a small group, you can cut the recipe in half. This way, you still enjoy this treat without leftovers. For larger gatherings, simply double the ingredients. This will ensure everyone gets a slice. Another fun idea is to make mini cheesecakes. Use a muffin tin or small cups. Just layer the crust and filling in each cup. This makes perfect individual servings. Plus, they are easy to share and even easier to eat! To keep your No Bake Oreo Cheesecake fresh, wrap it well. Use plastic wrap to cover the cheesecake. This helps prevent it from drying out. You can also use an airtight container. When stored correctly, it lasts up to five days in the refrigerator. Always place it on a flat surface to avoid bumps. If you have leftovers, you can freeze them. Cut the cheesecake into slices first. Wrap each slice in plastic wrap, then place them in a freezer-safe bag. This way, you can enjoy a piece later. To thaw, remove a slice from the freezer and place it in the fridge overnight. This keeps the texture nice and creamy. Enjoy your cheesecake at its best! Yes, you can use light cream cheese in this recipe. However, it may change the taste and texture. Light cream cheese is less rich and creamy. Your cheesecake might be less thick and not as silky. If you want a lighter option, this can work. Just keep in mind the taste may be different. The cheesecake needs to set for at least 4 hours. This time helps it firm up nicely. For the best results, I suggest chilling it overnight. This way, all the flavors blend together well. The longer it chills, the better it tastes! Yes, you can make this cheesecake gluten-free! Look for gluten-free Oreo cookies. There are brands that offer these options. You can also use gluten-free chocolate sandwich cookies. They work just as well in the crust and filling. Enjoy a delicious treat without the gluten! This blog post covered how to make a delicious cheesecake. We went through the ingredients, step-by-step instructions, and tips to get the texture just right. You can even modify the recipe for different flavors or serving sizes. Storing your cheesecake properly ensures it stays fresh. Remember to check the FAQs for common questions and answers. By following these steps, you'll create a cheesecake everyone will love. Enjoy experimenting and sharing your tasty treats!

Ingredients

To make a No Bake Oreo Cheesecake, you will need the following ingredients:

– 24 Oreo cookies, crushed

– 4 tablespoons unsalted butter, melted

– 16 oz cream cheese, softened

– 1 cup powdered sugar

– 1 teaspoon vanilla extract

– 1 cup heavy whipping cream

– 12 Oreo cookies, roughly chopped for filling

– 6 Oreo cookies, crushed for topping

– Optional: Chocolate shavings for garnish

These ingredients combine to create a rich and creamy dessert. The Oreos give a great flavor and crunch. Using unsalted butter helps control the saltiness. Cream cheese adds a smooth texture, while powdered sugar sweetens the mix. Vanilla extract enhances the cheesecake’s flavor. Heavy whipping cream makes it light and fluffy. Chopped Oreos throughout the filling add more cookie goodness. Crushed Oreos on top provide a nice finish. If you want to get fancy, add chocolate shavings for garnish.

Step-by-Step Instructions

Preparing the Crust

To make the crust, start by crushing 24 Oreo cookies. You can use a food processor or place them in a bag and crush them with a rolling pin. Next, melt 4 tablespoons of unsalted butter. Mix the crushed cookies with the melted butter until it looks like wet sand. This mixture is key to a tasty crust.

Now, take a 9-inch springform pan. Press the Oreo mixture into the bottom of the pan. Use the back of a measuring cup to pack it tightly. This helps the crust hold together. Once you finish, put the pan in the fridge while you make the filling. Chilling it will keep the crust firm.

Making the Filling

In a large bowl, beat 16 ounces of softened cream cheese. Use an electric mixer set to medium speed. Mix until it is smooth and creamy. This step is important for a rich filling. Then, slowly add in 1 cup of powdered sugar and 1 teaspoon of vanilla extract. Continue mixing until everything is well combined.

In a separate bowl, whip 1 cup of heavy cream on high speed. Whip until stiff peaks form. This means when you lift the beaters, the cream holds its shape. Gently fold the whipped cream into the cream cheese mixture. Be careful not to deflate the whipped cream. This keeps the filling light and fluffy. Finally, stir in 12 roughly chopped Oreo cookies. They add a nice texture to the filling.

Assembling the Cheesecake

Take the crust out of the fridge. Pour the filling over the chilled crust. Spread it evenly across the surface. Tap the springform pan on the counter a few times. This helps remove any air bubbles. For a final touch, sprinkle 6 crushed Oreo cookies on top of the cheesecake. This adds a delicious decoration.

Cover the cheesecake with plastic wrap. Refrigerate it for at least 4 hours, or overnight if you can wait. This allows the cheesecake to set properly. After it’s firm, carefully remove the sides of the springform pan. If you want, add chocolate shavings as a garnish. Enjoy your no-bake Oreo cheesecake!

Tips & Tricks

Achieving the Perfect Texture

To get the best texture for your No Bake Oreo Cheesecake, use cream cheese at room temperature. Cold cream cheese can make lumps in your filling. Softened cream cheese mixes in smoothly. This gives your cheesecake a creamy base.

Folding is key to making your filling light and airy. After you whip the cream, gently fold it into the cream cheese mix. Use a spatula and move in a circular motion. Be careful not to stir too hard. You want to keep the air in the whipped cream.

Serving Suggestions

For toppings, sprinkle crushed Oreo cookies on top. You can also add chocolate shavings for extra flair. These toppings not only look good but also add more flavor.

Pair your cheesecake with a glass of cold milk or a cup of coffee. The rich flavors of the cheesecake work well with these drinks. If you want something sweet, serve it with chocolate ice cream. This makes a great dessert combo that everyone will love.

Variations

Flavor Modifications

You can easily change the flavor of your No Bake Oreo Cheesecake. One fun way is to use different cookies. For example, try using Golden Oreos instead of regular ones. This will give your cheesecake a sweeter and lighter taste. You can also add mint extract to the filling. Just a teaspoon will make your dessert fresh and cool. If you want a richer flavor, consider adding a bit of espresso powder. This enhances the chocolate taste of the Oreos.

Serving Sizes

You can adjust the recipe to fit any gathering size. If you have a small group, you can cut the recipe in half. This way, you still enjoy this treat without leftovers. For larger gatherings, simply double the ingredients. This will ensure everyone gets a slice.

Another fun idea is to make mini cheesecakes. Use a muffin tin or small cups. Just layer the crust and filling in each cup. This makes perfect individual servings. Plus, they are easy to share and even easier to eat!

Storage Info

Best Practices for Storage

To keep your No Bake Oreo Cheesecake fresh, wrap it well. Use plastic wrap to cover the cheesecake. This helps prevent it from drying out. You can also use an airtight container. When stored correctly, it lasts up to five days in the refrigerator. Always place it on a flat surface to avoid bumps.

Freezing Instructions

If you have leftovers, you can freeze them. Cut the cheesecake into slices first. Wrap each slice in plastic wrap, then place them in a freezer-safe bag. This way, you can enjoy a piece later. To thaw, remove a slice from the freezer and place it in the fridge overnight. This keeps the texture nice and creamy. Enjoy your cheesecake at its best!

FAQs

Can I use light cream cheese?

Yes, you can use light cream cheese in this recipe. However, it may change the taste and texture. Light cream cheese is less rich and creamy. Your cheesecake might be less thick and not as silky. If you want a lighter option, this can work. Just keep in mind the taste may be different.

How long does the cheesecake need to set?

The cheesecake needs to set for at least 4 hours. This time helps it firm up nicely. For the best results, I suggest chilling it overnight. This way, all the flavors blend together well. The longer it chills, the better it tastes!

Can I make this recipe gluten-free?

Yes, you can make this cheesecake gluten-free! Look for gluten-free Oreo cookies. There are brands that offer these options. You can also use gluten-free chocolate sandwich cookies. They work just as well in the crust and filling. Enjoy a delicious treat without the gluten!

This blog post covered how to make a delicious cheesecake. We went through the ingredients, step-by-step instructions, and tips to get the texture just right. You can even modify the recipe for different flavors or serving sizes. Storing your cheesecake properly ensures it stays fresh. Remember to check the FAQs for common questions and answers.

By following these steps, you’ll create a cheesecake everyone will love. Enjoy experimenting and sharing your tasty treats!

To make a No Bake Oreo Cheesecake, you will need the following ingredients: - 24 Oreo cookies, crushed - 4 tablespoons unsalted butter, melted - 16 oz cream cheese, softened - 1 cup powdered sugar - 1 teaspoon vanilla extract - 1 cup heavy whipping cream - 12 Oreo cookies, roughly chopped for filling - 6 Oreo cookies, crushed for topping - Optional: Chocolate shavings for garnish These ingredients combine to create a rich and creamy dessert. The Oreos give a great flavor and crunch. Using unsalted butter helps control the saltiness. Cream cheese adds a smooth texture, while powdered sugar sweetens the mix. Vanilla extract enhances the cheesecake's flavor. Heavy whipping cream makes it light and fluffy. Chopped Oreos throughout the filling add more cookie goodness. Crushed Oreos on top provide a nice finish. If you want to get fancy, add chocolate shavings for garnish. To make the crust, start by crushing 24 Oreo cookies. You can use a food processor or place them in a bag and crush them with a rolling pin. Next, melt 4 tablespoons of unsalted butter. Mix the crushed cookies with the melted butter until it looks like wet sand. This mixture is key to a tasty crust. Now, take a 9-inch springform pan. Press the Oreo mixture into the bottom of the pan. Use the back of a measuring cup to pack it tightly. This helps the crust hold together. Once you finish, put the pan in the fridge while you make the filling. Chilling it will keep the crust firm. In a large bowl, beat 16 ounces of softened cream cheese. Use an electric mixer set to medium speed. Mix until it is smooth and creamy. This step is important for a rich filling. Then, slowly add in 1 cup of powdered sugar and 1 teaspoon of vanilla extract. Continue mixing until everything is well combined. In a separate bowl, whip 1 cup of heavy cream on high speed. Whip until stiff peaks form. This means when you lift the beaters, the cream holds its shape. Gently fold the whipped cream into the cream cheese mixture. Be careful not to deflate the whipped cream. This keeps the filling light and fluffy. Finally, stir in 12 roughly chopped Oreo cookies. They add a nice texture to the filling. Take the crust out of the fridge. Pour the filling over the chilled crust. Spread it evenly across the surface. Tap the springform pan on the counter a few times. This helps remove any air bubbles. For a final touch, sprinkle 6 crushed Oreo cookies on top of the cheesecake. This adds a delicious decoration. Cover the cheesecake with plastic wrap. Refrigerate it for at least 4 hours, or overnight if you can wait. This allows the cheesecake to set properly. After it's firm, carefully remove the sides of the springform pan. If you want, add chocolate shavings as a garnish. Enjoy your no-bake Oreo cheesecake! To get the best texture for your No Bake Oreo Cheesecake, use cream cheese at room temperature. Cold cream cheese can make lumps in your filling. Softened cream cheese mixes in smoothly. This gives your cheesecake a creamy base. Folding is key to making your filling light and airy. After you whip the cream, gently fold it into the cream cheese mix. Use a spatula and move in a circular motion. Be careful not to stir too hard. You want to keep the air in the whipped cream. For toppings, sprinkle crushed Oreo cookies on top. You can also add chocolate shavings for extra flair. These toppings not only look good but also add more flavor. Pair your cheesecake with a glass of cold milk or a cup of coffee. The rich flavors of the cheesecake work well with these drinks. If you want something sweet, serve it with chocolate ice cream. This makes a great dessert combo that everyone will love. {{image_2}} You can easily change the flavor of your No Bake Oreo Cheesecake. One fun way is to use different cookies. For example, try using Golden Oreos instead of regular ones. This will give your cheesecake a sweeter and lighter taste. You can also add mint extract to the filling. Just a teaspoon will make your dessert fresh and cool. If you want a richer flavor, consider adding a bit of espresso powder. This enhances the chocolate taste of the Oreos. You can adjust the recipe to fit any gathering size. If you have a small group, you can cut the recipe in half. This way, you still enjoy this treat without leftovers. For larger gatherings, simply double the ingredients. This will ensure everyone gets a slice. Another fun idea is to make mini cheesecakes. Use a muffin tin or small cups. Just layer the crust and filling in each cup. This makes perfect individual servings. Plus, they are easy to share and even easier to eat! To keep your No Bake Oreo Cheesecake fresh, wrap it well. Use plastic wrap to cover the cheesecake. This helps prevent it from drying out. You can also use an airtight container. When stored correctly, it lasts up to five days in the refrigerator. Always place it on a flat surface to avoid bumps. If you have leftovers, you can freeze them. Cut the cheesecake into slices first. Wrap each slice in plastic wrap, then place them in a freezer-safe bag. This way, you can enjoy a piece later. To thaw, remove a slice from the freezer and place it in the fridge overnight. This keeps the texture nice and creamy. Enjoy your cheesecake at its best! Yes, you can use light cream cheese in this recipe. However, it may change the taste and texture. Light cream cheese is less rich and creamy. Your cheesecake might be less thick and not as silky. If you want a lighter option, this can work. Just keep in mind the taste may be different. The cheesecake needs to set for at least 4 hours. This time helps it firm up nicely. For the best results, I suggest chilling it overnight. This way, all the flavors blend together well. The longer it chills, the better it tastes! Yes, you can make this cheesecake gluten-free! Look for gluten-free Oreo cookies. There are brands that offer these options. You can also use gluten-free chocolate sandwich cookies. They work just as well in the crust and filling. Enjoy a delicious treat without the gluten! This blog post covered how to make a delicious cheesecake. We went through the ingredients, step-by-step instructions, and tips to get the texture just right. You can even modify the recipe for different flavors or serving sizes. Storing your cheesecake properly ensures it stays fresh. Remember to check the FAQs for common questions and answers. By following these steps, you'll create a cheesecake everyone will love. Enjoy experimenting and sharing your tasty treats!

No Bake Oreo Cheesecake

Indulge in the creamy delight of No Bake Oreo Cheesecake that will have everyone asking for seconds! This easy recipe combines crushed Oreo cookies and a luscious cream cheese filling, making it a perfect dessert for any occasion. With just a few simple ingredients, you can create this irresistible treat.

Ingredients
  

24 Oreo cookies, crushed

4 tablespoons unsalted butter, melted

16 oz cream cheese, softened

1 cup powdered sugar

1 teaspoon vanilla extract

1 cup heavy whipping cream

12 Oreo cookies, roughly chopped for filling

6 Oreo cookies, crushed for topping

Optional: Chocolate shavings for garnish

Instructions
 

In a mixing bowl, combine the crushed Oreo cookies with melted butter. Mix until the mixture resembles wet sand.

    Press the Oreo mixture into the bottom of a 9-inch springform pan to form the crust. Use the back of a measuring cup to pack it tightly. Refrigerate while preparing the filling.

      In a large bowl, beat the softened cream cheese until smooth and creamy, using an electric mixer on medium speed.

        Gradually add in the powdered sugar and vanilla extract, mixing until well combined.

          In a separate bowl, whip the heavy cream on high speed until stiff peaks form.

            Gently fold the whipped cream into the cream cheese mixture, making sure to maintain the lightness and volume of the whipped cream.

              Stir in the chopped Oreo cookies until evenly distributed throughout the filling.

                Pour the filling over the chilled crust and spread it evenly. Tap the springform pan on the counter to remove air bubbles.

                  Sprinkle the crushed Oreo cookies on top of the cheesecake for decoration.

                    Cover the cheesecake with plastic wrap and refrigerate for at least 4 hours or overnight for best results.

                      Once set, carefully remove the sides of the springform pan before serving. If desired, garnish with chocolate shavings for extra decadence.

                        Prep Time: 20 minutes | Total Time: 4 hours | Servings: 10