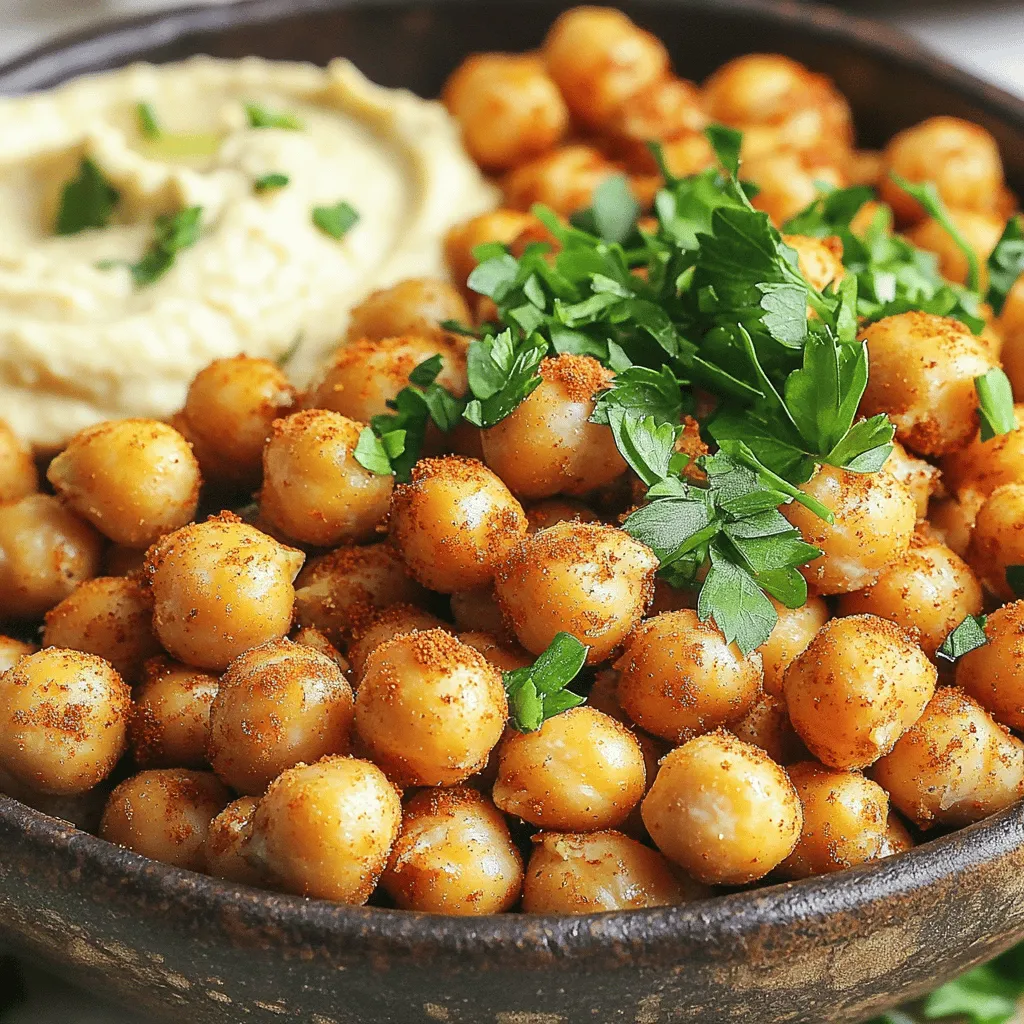
Looking for a new, tasty snack that’s both healthy and satisfying? You’ve come to the right place! Air fryer crispy chickpeas are crunchy, flavorful, and easy to make. In this guide, I’ll share the best ingredients, simple steps, and expert tips to help you create the perfect snack. Whether you want a quick bite or a party treat, crispy chickpeas are the answer. Let’s dive in and get cooking!

Ingredients
Key Ingredients for Air Fryer Crispy Chickpeas
For crispy air fryer chickpeas, you need these key ingredients:
– 1 can (15 oz) chickpeas, drained and rinsed
– 1 tablespoon olive oil
– 1 teaspoon garlic powder
– 1 teaspoon smoked paprika
– ½ teaspoon cumin
– ½ teaspoon salt
– ¼ teaspoon black pepper
– ¼ teaspoon cayenne pepper (optional, for heat)
– Fresh parsley, chopped (for garnish)
These simple items create a tasty snack. The chickpeas give you protein and fiber. Olive oil adds healthy fat and helps them crisp up. The spices bring flavor and a bit of heat.
Optional Seasonings for Extra Flavor
Feel free to mix in some extra seasonings for more flavor. Here are a few ideas:
– Lemon zest for brightness
– Onion powder for depth
– Chili powder for a kick
– Parmesan cheese for a savory touch
Experimenting with these can make your chickpeas even better. Each addition brings its own twist to the taste.
Ingredient Substitutions for Dietary Needs
You can easily swap ingredients to fit your dietary needs:
– Use avocado oil instead of olive oil for a different flavor and health benefits.
– If you need a low-sodium option, skip or reduce the salt.
– For a gluten-free choice, rest assured chickpeas are naturally gluten-free.
These swaps allow everyone to enjoy crispy chickpeas. Tailor the recipe to your liking and dietary needs.
Step-by-Step Instructions
Prepping the Chickpeas for Crispiness
To start, preheat your air fryer to 400°F (200°C). This step warms it up for even cooking. Next, take a can of chickpeas and drain it. Rinse the chickpeas well under cold water. This removes extra salt and helps the flavor. After rinsing, dry the chickpeas thoroughly. Use a clean kitchen towel to pat them dry. The drier they are, the crispier they will become.
Seasoning and Tossing the Chickpeas
In a mixing bowl, add the dry chickpeas. Pour in 1 tablespoon of olive oil. This oil helps them crisp up nicely. Next, add 1 teaspoon of garlic powder, 1 teaspoon of smoked paprika, and ½ teaspoon each of cumin and salt. Don’t forget ¼ teaspoon of black pepper and cayenne pepper if you like heat! Toss everything well so the chickpeas are coated evenly. This gives them great flavor.
Cooking Process in the Air Fryer
Now, it’s time to cook! Place the seasoned chickpeas in the air fryer basket in a single layer. Avoid overcrowding them. This lets hot air flow around each chickpea. Air fry for 15 to 20 minutes. Shake the basket halfway through to ensure even cooking. Keep an eye on them. You want them golden brown and crispy. When they finish, let them cool for a few minutes. They will get even crispier as they cool. If you want, garnish with fresh parsley before serving. Enjoy your healthy snack!
Tips & Tricks
Ensuring Perfectly Crispy Chickpeas
To get the best crispy chickpeas, you must dry them well. After rinsing, use a clean towel to pat them dry. The drier they are, the crispier they get.
Use just the right amount of olive oil. Too much will make them soggy. One tablespoon is perfect. Coat them evenly with spices for great flavor. Shake the basket halfway through cooking to help them crisp on all sides.
Common Mistakes to Avoid
A common mistake is overcrowding the air fryer. This leads to uneven cooking. Always spread the chickpeas out in a single layer.
Another mistake is not drying the chickpeas enough. If they are wet, they won’t get crispy. Keep an eye on them towards the end of cooking. If they start to brown too much, take them out.
Garnishing Ideas for Serving
Garnish your crispy chickpeas with fresh parsley for a pop of color. You can also add a squeeze of lemon juice for a fresh taste. For more flavor, try serving them with dips like hummus or yogurt. This adds a nice touch and makes them even more enjoyable.

Variations
Flavor Variations for Chickpeas
You can change the flavor of your crispy chickpeas easily. Here are some ideas:
– Italian Style: Use Italian herbs like oregano and basil.
– Spicy Sriracha: Toss with sriracha before air frying for heat.
– Sweet Cinnamon: Mix chickpeas with cinnamon and a touch of sugar for a sweet snack.
– BBQ Twist: Use your favorite BBQ seasoning for a smoky taste.
These flavors can make your snack fun and new each time!
Alternative Cooking Methods
If you do not have an air fryer, no worries! You can make crispy chickpeas in the oven:
– Oven Method: Preheat your oven to 400°F (200°C). Place the seasoned chickpeas on a baking sheet. Bake for 25-30 minutes, shaking the pan halfway through.
You can also try using a stovetop skillet:
– Skillet Method: Heat a little oil in a pan. Add the chickpeas and cook on medium heat, stirring often until they are crispy.
Each method gives you a tasty treat!
Serving Suggestions for Different Occasions
These crispy chickpeas work for any time. Here are some serving ideas:
– Game Day Snack: Serve with a spicy dip and veggies.
– Movie Night: Pair with popcorn for a fun mix.
– Salad Topping: Add them to salads for extra crunch.
– Party Appetizer: Serve in small bowls with dips like hummus or yogurt.
These ideas make your crispy chickpeas a great addition to any gathering!
Storage Info
How to Store Leftover Crispy Chickpeas
To keep your crispy chickpeas fresh, store them in an airtight container. This prevents moisture from making them soggy. Let them cool completely before sealing. For best results, use the chickpeas within a few days. If you don’t have an airtight container, use a zip-top bag. Just make sure to press out as much air as possible.
Reheating Tips for Optimal Crispiness
Reheating crispy chickpeas can be tricky. To regain their crunch, use your air fryer. Set it to 350°F (175°C) for about 5 minutes. This method brings back their crunch without drying them out. You can also use the oven. Spread them on a baking sheet and heat for 10 minutes. Keep an eye on them to avoid burning.
Shelf Life of Cooked Chickpeas
Cooked chickpeas last for about 3 to 5 days in the fridge. If you notice any changes in color or smell, toss them out. For longer storage, freeze them. Place cooled chickpeas in a freezer bag and remove all air. They can stay good for up to 3 months in the freezer. Just remember to reheat them for the best crunch!
FAQs
Can I use dried chickpeas instead of canned?
Yes, you can use dried chickpeas. However, you must cook them first. Soak the dried chickpeas overnight in water. Then, boil them until soft. After cooking, follow the same steps as you would with canned chickpeas. Remember to dry them well before seasoning. This extra step takes time but can give a fresher taste.
How do I make chickpeas crunchy without an air fryer?
You can roast chickpeas in your oven for a crunchy snack. Start by preheating your oven to 400°F (200°C). Drain and rinse your chickpeas, then dry them well. Spread them on a baking sheet in a single layer. Toss with olive oil and your favorite spices. Roast them for 25-30 minutes, shaking the pan halfway. Keep an eye on them to avoid burning.
What are the best dips to pair with crispy chickpeas?
Crispy chickpeas go well with many dips. Hummus is a classic choice. You can also try yogurt-based dips or guacamole. For a spicy kick, serve with a sriracha mayo. These dips add creaminess and flavor, making your snack even better.
You learned how to make crispy chickpeas using an air fryer. We covered key ingredients, seasoning options, and easy steps to crisp them perfectly. Remember to avoid common mistakes for the best results. Explore flavor variations and serving ideas to keep things fun. Finally, know how to store leftovers and reheat them for crunch. Crispy chickpeas are tasty, healthy, and easy to make. Enjoy your cooking and share these tips with friends!

